Making Kodi Yours - Installing Add-Ons and More Part 1
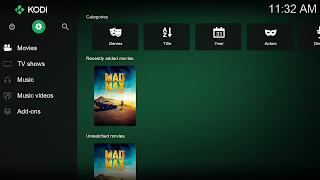
So you have installed Kodi. Now it is time to make it yours. From changing the color of the interface to increasing Kodi's functionality by installing add-ons, there are many ways to make it "yours". So let's start with the easier ways to customize your install. In this post I will show you how to change the look and feel of Kodi. Stay tuned for Part 2 to install and configure Add-Ons.
Note: Everything I will be showing you can be done in the settings menu. To access this menu, click on the sprocket icon as shown in the below picture.
1. Change the Interface Color. If you do not like the default blue color, you can change it. In the settings menu, go to "Interface Settings" - "Skin" and click on "Colors". This will bring a menu that will allow you to choose another color. The color change will be applied once you click on the color of your choice.
2. Change the Background Pattern and overall Theme. If you want to make Kodi look more interesting, you can change the default background pattern and its theme. In the settings menu, go to "Skin Settings" - "Art Work". In this menu you can change your Background Pattern and the Theme used by the main program.
3. Change what is shown on the Home Screen. In the same menu that you chose your background pattern and theme, you can select what is displayed on the "Home Screen". In the settings menu, go to "Skin Settings" - "Main menu items". In the "Main menu items" screen you can turn off and on what is displayed by clicking the sliders on the right.
4. Change the skin Kodi uses. If you want to really customize the look and feel of your Kodi install, you can change the skin it uses. This is the ulitmate way to change Kodi's look and feel. In the settings menu, go to "Interface Settings" - "Skin" - "Skin". This will bring up a dialogue box that will allow you to change the default skin. Click on the skin you want to try and it will apply itself automatically. In the example shown, I chose to change the skin from Estuary to Confluence.
That is all for today. Next time I will cover how to expand the capabilities of Kodi by installing Add-Ons.


Comments
Post a Comment