Stereo Pi - An Experiment in DIY Stereo System - Part One
Greetings from the "Nut Hutch". Today we had an unusual event for this time of the year, it has been raining all day. I am so disappointed that I had to put my yard work on hold... not. Since I was stuck indoors, I decided it was time to talk about my "Stereo Pi" project. This project was born out of my disappointment with the sound quality of music out of my current multimedia setup, a Soundbar/ Sub-woofer combo. While it does a good job for movies and television programs, its music playback tends to be very muddy and distorted. This quest for better sound quality took me down a surprising path. Which turned out to be quite fun and a learning experience for me. Since this project is a long one, I am breaking it down into two posts. Today I will discuss the parts I purchased and next time I will discuss how I built it and the results.

Ultimately I wanted something that I could play all of my digital music through. With this goal in mind, I came up with some requirements. First of all, I needed to be able to access all of my music files. So whatever I purchased had to either have some sort of internal storage, or be able to stream these files over my home network. Whatever I chose, also needed to have some sort of display and software interface that allowed me to browse through my files and to see what was currently playing. The interface used to browse and playback these files needed to be user friendly. So that someone with limited knowledge of technology could easily use it. Finally, it needed fit into my limited budget. I started to do some research on what was available that met my requirements. The end result was very disappointing. I could find solutions in my price range, but they either had poor sound quality, limited features, or were just not easy to use. The products that did meet all of my requirements were way out of my budget. Ironically, these solutions were all some sort of mini-computer. With this knowledge in hand, and the fact that I enjoy building custom computers, I decided that I would build my own. After some further research, I settled on a solution using a Raspberry Pi and some add-ons.
Parts List
In gathering the parts needed for my project, I kept two things in mind. Since I wanted to maximize my limited budget, I waited for the new parts I needed to go on sale. To stretch this budget even further, I also decided to "recycle" parts from past projects and parts that I could find "lying around". Keeping to these rules tested my patients to the limits. Altogether, it took about two months to gather all the parts I needed to complete this project. In the end, however, the long time spent gathering everything gave me a change to refine my design into something that I was quite pleased with.
Raspberry Pi 3 Model B
 The heart of my system is a Raspberry Pi 3 Model B. While there are faster mini-computers available, they tend to be more expensive. The "starter kits" available for it are more reasonable and it has the largest selection of "add-on" cards. Also, since I was going to be used for music playback, I did not need the fastest available mini-pc board available. The "starter kit" I purchased came from a company called Landzo, link. It included the Raspberry Pi 3, Genuine Raspberry Pi power supply, heat sinks, and a case.
7 Inch Touch Screen
 In order to manage my music and to see what was playing, I needed some sort of display. I decided to go with a 7 inch screen because I felt that a 5 inch screen was too small for what I wanted to do and that a 10 inch screen was just too big. After looking at what was available, I decided to go with a this screen, link, from 52Pi. Since it has the driver board built in, it is very compact.
Sound and Amplifier Card
 While the Raspberry Pi has a built in sound card, the sound quality is not the greatest and it is not amplified. Because I wanted to keep things simple, I did not want to use powered speakers. After doing some digging, I found this gem of an add-on card, the X5000 Expansion Board also from 52Pi, link. It combines the award wining Digital to Analog Converter (DAC) from HiFIBerry with a small 30 watt stereo amplifier. Since it connects to the Raspberry Pi using the GPIO pins, it also adds more functionality to the Raspberry Pi. It provides an On/ Off switch, external volume control, and power the Raspberry Pi itself. Finally, if in the future I decide to go to a self-amplified speaker set-up, I can disable the built in amplifier using a jumper without sacrificing any of the additional "convenience" features of the card. This was the only part I paid full price for. I felt that its features and quality construction were well worth the extra money.
Raspberry Pi Heat Sink and Fan
 While the kit for the Raspberry Pi I purchased had heat sinks included, I felt they were inadequate for my needs. It gets rather warm here in Thailand, especially in the summer. I wanted to give the Raspberry Pi a cooling solution that could handle the higher ambient temperatures. Again the solution I went with is made by 52Pi, link. I figured it was worth the piece of mind to make sure that my set-up did not overheat.
Double GPIO Adapter for Raspberry Pi 3 Model B
 Since both the Sound Card and the Heat Sink fans connect to the Raspberry PI via the GPIO pins, I needed something to double the number of pins I had available. This little adapter from UGeek did the trick, link. Not only did it give me a second set of pins for the GPIO header, it increased the distance between the Raspberry Pi and the Sound Card. This allowed room for the heatsink to "breathe". As with the upgraded heat sink, I felt it was money well spent.
Micro-SD Card and Operating System
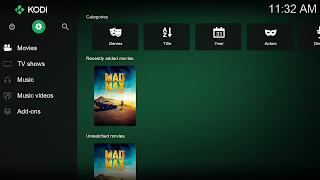
 The Raspberry Pi runs its operating system off of a Micro-SD card. Because of this, having a Micro-SD card with fast IO speeds is essential. The card I purchased was a 32gb Sandisk Extreme Pro, link. With a read/ write speed 100Mb/s, the Raspberry Pi boots quickly and the interface feels very responsive. For an Operating System, after some experimentation, I decided to go with OSMC. It is not only lightweight, but provides the familiar Kodi interface that I like. It was easy to setup and integrate into my home network.
Remote Control
 Having a nice sounding stereo is all well and good, but you need to control it. For this duty, I went with my old favorite, the Minix Neo A2, link. Its fit and finish is of a high quality and is easily configured from inside Kodi.
Volume Knob
 While the sound card comes with an external volume control, it is just the potentiometer and is missing the knob. To rectify this situation, I found this high quality aluminum knob, link.
Internal Storage and Powered USB Hub
 I was not happy with the idea of having my "Stereo Pi" stream music off of my network. I decided to give it some local storage. After rooting around my spare parts bin, I found that I had an extra external hard drive that I was not using. It is a 2TB Western Digital My Passport USB 3.0 drive. While this storage solution was overkill, it gave me room to add my Music Video collection into the mix. Using this drive did create a small problem. Bear with me, this is going to get a little technical. This drive requires a 5 Volt 2 Amp power supply. Normally this is provided by the USB 3.0 ports on a computer. The Raspberry Pi 3 only has four USB 2.0 ports. In order to power this drive properly, I would need to use two out of the four onboard ports. Unfortunately, the USB ports on the Raspberry Pi share the same bus for both power and data transmission. The onboard USB ports could not provide enough power to run both the LCD Screen and the Hard Drive at the same time. To fix this, I purchased a USB hub that had its own power source. This allowed me to take the electrical load for the external hard drive off of the USB bus on the Raspberry Pi.
USB WiFi Dongle
 Having a powered USB hub allowed me to use a different WiFi adapter than the one integrated into the Raspberry Pi. By using this hub, I was able to place the WiFi dongle outside of the enclosure. This increased the speed in which the Raspberry Pi was able to access not only the internet but my home network as well. The dongle I purchased was a TP-Link TL-WN725N Nano USB adapter, link.
External Fused Power Connection and Internal Surge Protector
 Now that I needed essentially two power supplies to power everything properly, I needed some way to tie them all together. I decided put the power supplies inside whatever enclosure I had built for the Raspberry Pi. With a little modification of a high quality surge protector and an external fused power connection I had my answer. The external power connector, link, has a 10 Amp fuse for surge protection and gets its power from a standard computer power supply plug.
Speakers
 Due to a generous friend, I received a nice set of speakers for this project. A pair of Kicker DS62 component speakers, link. "What!?! A set of car speakers!" I can hear you cry. I did this for a couple of reasons. The main reason was that they were free. Second, with a proper sized enclosure, the sound quality they put out is very full and crisp. While on their own, they do not have the bass "punch" that many people desire, their clarity in the middle and high frequencies more than make up for it. In the future I do plan on adding a powered Sub-woofer to add this punch.
Miscellaneous Bits and Bobs
Finally, there were some small items that were needed for this project. For airflow through the Stereo Pi's enclosure, I purchased a 120mm 5v fan that could be powered from the header 5v header on the sound card. I also found some old speaker grills. I cut these up to give the enclosure's air intake and exhaust openings a nice looking grill. I also purchased some rubber feet for the enclosure, speaker cable, speaker terminals, and speaker cable connectors.
Now that I had all the parts, it was time to assemble it and put it into some sort of enclosure. I look forward to discussing how I tied everything together in my next post. Thank you all for reading.
Cheers!
You can go onto part 2 by following this link.

Ultimately I wanted something that I could play all of my digital music through. With this goal in mind, I came up with some requirements. First of all, I needed to be able to access all of my music files. So whatever I purchased had to either have some sort of internal storage, or be able to stream these files over my home network. Whatever I chose, also needed to have some sort of display and software interface that allowed me to browse through my files and to see what was currently playing. The interface used to browse and playback these files needed to be user friendly. So that someone with limited knowledge of technology could easily use it. Finally, it needed fit into my limited budget. I started to do some research on what was available that met my requirements. The end result was very disappointing. I could find solutions in my price range, but they either had poor sound quality, limited features, or were just not easy to use. The products that did meet all of my requirements were way out of my budget. Ironically, these solutions were all some sort of mini-computer. With this knowledge in hand, and the fact that I enjoy building custom computers, I decided that I would build my own. After some further research, I settled on a solution using a Raspberry Pi and some add-ons.
Parts List
In gathering the parts needed for my project, I kept two things in mind. Since I wanted to maximize my limited budget, I waited for the new parts I needed to go on sale. To stretch this budget even further, I also decided to "recycle" parts from past projects and parts that I could find "lying around". Keeping to these rules tested my patients to the limits. Altogether, it took about two months to gather all the parts I needed to complete this project. In the end, however, the long time spent gathering everything gave me a change to refine my design into something that I was quite pleased with.
Raspberry Pi 3 Model B

7 Inch Touch Screen

Sound and Amplifier Card

Raspberry Pi Heat Sink and Fan

Double GPIO Adapter for Raspberry Pi 3 Model B

Micro-SD Card and Operating System

Remote Control

Volume Knob

Internal Storage and Powered USB Hub

USB WiFi Dongle

External Fused Power Connection and Internal Surge Protector

Speakers

Miscellaneous Bits and Bobs
Finally, there were some small items that were needed for this project. For airflow through the Stereo Pi's enclosure, I purchased a 120mm 5v fan that could be powered from the header 5v header on the sound card. I also found some old speaker grills. I cut these up to give the enclosure's air intake and exhaust openings a nice looking grill. I also purchased some rubber feet for the enclosure, speaker cable, speaker terminals, and speaker cable connectors.
Now that I had all the parts, it was time to assemble it and put it into some sort of enclosure. I look forward to discussing how I tied everything together in my next post. Thank you all for reading.
Cheers!
You can go onto part 2 by following this link.


Ujunccifarcpo Kristy Jones Here
ReplyDeleteciibithemer
juncposKit-bo Mike Donovan JetBrains GoLand 2022.2
ReplyDeleteMAMP PRO 5.0.5.3998
Zortam Mp3 Media Studio Pro 29.85
JetBrains Rider 2022.2
raimalodro