Manjaro and Deepin Desktop 15.5 - Elegance Redefined
Greetings from the nut hutch that is my house here in Thailand. While Thailand doesn't celebrate Thanksgiving and Christmas like we do in the West, the Expat community here does. So I have been off visiting friends, doing some Christmas shopping, and picking up the latest cold that is going around some of the students I tutor. Next thing I know, it is the middle of December, and I have not put out a blog entry in a while. During my "break", I was issued a challenge by a fellow Expat. To install and use the Manjaro Deepin Community Edition for a month. Since I was impressed with Manjaro's implementation of the Gnome DE, link, I decided to take up that challenge.

Overview
Before I get too far into this post, an explanation needs to be given. There are two projects that use the Deepin name, and to make it even more confusing, they are developed and maintained by the same company, Wuhan Deepin Technology. They are responsible for not only the Deepin Desktop Environment, but also their own Linux distro based on Debian called Deepin Desktop, link. Today I will be discussing the Deepin Desktop Environment and will be calling it Deepin for simplicity. I have never been one to use a "light-weight" Desktop Environment (DE). They always felt like they were missing something. Whether it was the overall polish or missing settings in their configuration menus, they just never really clicked with me. After two weeks of daily use, I have to say that I am totally impressed with Deepin. The overall feel and finish of the desktop gives the "big boys", Gnome, KDE, Mate, etc.. a run for their money. On my laptop, it felt so much snappier than Gnome and even more responsive than Mate! As with my Manjaro Gnome install, Deepin recognized and installed the PROPER drivers not only for my graphics card, nVidia GTX-670M, but my networking card, Atheros AR-8151, out of the box as well. I mention this again, because despite years of development, Ubuntu has yet to figure out how to do this.
As with other desktop environments, Deepin comes with its own suite of tools that allows you to adjust your systems settings. It is called the "Control Center", and is located on a side-bar. It can either be accessed from the Control Center icon on the dock or clicking on the lower right hand corner of your desktop. What I find most appealing about Deepin's Control Center is how it is laid out. It is completely contained in this right side-bar and can be scrolled through using either the mouse's scroll wheel or the keyboard's arrow keys. Each section of the Control Center is clearly labeled with its function. It also does not overload the user with more settings than they would normally use. In short, it is a clean and and highly organized tool that presents the user with the settings they can change in a clear and concise manner. Unfortunately, this simplicity comes through the use of some compromises. If your system requires a setting that is not listed in the Control Center, you will have to edit the settings manually using either dconf Editor or editing configuration files directly. In my case, I had to change some settings for my laptop's sound card and touch pad in this manner. I will discuss what I had to do to get this hardware working properly a little later in this post.
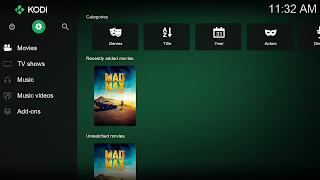
One of the things I really like about Deepin is how it lists the programs installed on the system. It organizes installed programs in a similar manner as Gnome 3 with the Dash to Dock extension installed. All installed applications can be found by hitting the Super Key, also known as the Windows Key. You can then select the program you want by either scrolling up or down to it and clicking on its icon or by just typing in its name. In this view, the programs can be listed either alphabetically or as in the picture on the left, by category. The user can also then send shortcuts to the applications they use most to the dock for even easier access. The dock dynamically adjusts its size based on the number of programs "docked" to it and will hide itself if it interferes with a running program by default. As with other docks, there is a full suite of settings available to the user to customize it to their individual taste. Personally, I have found that as I get older, this method of program organization and listing is much easier and faster for me than the traditional menu based system.
Other than its Control Center and how it lists its installed programs, Manjaro Deepin Community Edition is just like the other Manjaro releases. It uses the "rolling release" model so your installation never goes out of date. Deepin also uses the Pacmac program to manage program installations and updates from the GUI. Pacman and Yaourt are also used if the user wants to manage their software from the command line. It also has access to the Manjaro repositories and once enabled, the AUR. Flatpak is also enabled by default, so the user can also install programs from the Flatpak repository. Because of this, I am not going to discuss the programs that are installed by default with a couple of exceptions. Deepin uses its own version of several well known applications. For example, the default file manager is called Deepin File Manager (see right). It is a fork of Gnome's Nautilus to meet Deepin's design philosophy. One of my favorite programs they have developed is Deepin Music. It is very lightweight and has better sound quality than VLC. There are many more programs available that the Deepin Company has developed. You can find a full list of them on their website here.
Issues
I was able to boot to the Live Session from a USB drive without any problems. Deepin installed onto my laptop without any issues. Overall the install was very stable. On initial boot, I was greeted with a fully functioning desktop with all the needed drivers installed. Not only, as I stated before, were the correct drivers for my graphics card and network card installed, but my laptop's Bluetooth module was working properly. This module has never worked as it should, even when the laptop was running Windows 7! The install picked up and configured my wifi connection without too much fuss. All I needed to do to really start using my laptop was download and install updates. Needless to say, I was impressed. Unfortunately, I began to notice a couple of issues as I was customizing my install. The touchpad started to act "a bit wonky" and the sound quality I was getting from the built-in speakers was terrible and seemed to be mono only. The touchpad was the easiest to fix, so I will discuss it first.
Note: I tend to restart my system to apply changes instead of stopping and restarting the service. Not only is this a holdover from my DOS and CP/M days when the only way to test a settings change was to reboot, I have found from experience that it is the most accurate way to test if a fix works.
1. Touchpad
My laptop, an Asus ROG G75VW link, uses a Synaptics touchpad. In 2013 when this laptop was built, support for multi-finger scrolling in Windows was in its infancy and not implemented very well. Because of this poor implementation, multi-finger scrolling causes errors when you try to use the edge scrolling function. So the first thing I do with any Linux install, is to disable this function as well as "Tap to Click". I also like to be able to use the edge of my touchpad as a "scroll wheel" to scroll up and down. So I went to the "Mouse" section of the Command Center to change these settings. Unfortunately I saw that the settings available there were rather sparse, (see left). The only changes I was able to make was to disable both the "Tap to Click" and "Natural Scrolling" functions. I can hear the question now, "Why disable "Natural Scrolling"?" Because it reverses the scroll direction on my touchpad for some reason. Since the option to turn off multi-finger scrolling was not there, I had to go about it the "hard way". I fired up dconf Editor and started digging. I found the settings I needed to change at /com/deepin/dde/touchpad, (see left inset). There I disabled the "horiz-scroll-enabled" and the "vert-scroll-enabled" functions. After a quick restart, the edge scrolling function of my touchpad was functioning perfectly.
2. Sound
Now that I had the touchpad operating the way I like it, it was time to tackle the problem with the sound. My laptop is one of those that has a 2.1 speaker system built in. This means that it has a left and right stereo speakers as well as what can "generously" called a subwoofer. In order to get music and other sounds to play properly, I need to tell the system I am running a 2.1 setup. Otherwise the system will not be able to balance the sound output between the three speakers correctly and you loose the "stereo separation" of what you are listening to. In other words, it will sound like you have only a mono speaker in your system. With most Desktop Environments, this is not a problem. I can go to the "Sound" section of the settings menu and tell the system that I have a 2.1 speaker setup. As with the "Mouse" section of Deepin's Control Center, the options are very limited (see right). Even in the "Advanced" section, there was not a way to tell the system that I had a 2.1 speaker system. The only thing I could do there was to tell it which of my sound devices to use. This was a problem I had never run into before, so off to Google to search for a solution.
After trolling the web a couple of days, I stumbled across a solution in the Overclock.net forums. They had this wonderful how-to with explanations of the settings for multi-speaker set-ups in PulseAudio, link. Even though this was posted in 2013, it gave me a starting point to get the audio working properly on my laptop. It stated that I needed to change some settings in the deamon.conf file that PusleAudio gets its settings from. Before doing anything, I wanted to make a back-up. This way if I broke something, I could easily go back to "stock". So I opened the terminal and typed:
Now that I had a backup of my daemon.conf file, it was time to edit it. Since this is a system file, I need to be root to edit it. So I opened it in a root session of Nano by typing:
With the file opened in Nano, I looked for the following lines and edited them as follows:
; enable-lfe-remixing = yes to enable-lfe-remixing = yes
; default-sample-channels = 2 to default-sample-channels = 3
; default-channel-map = front-left,front-right to default-channel-map = front-left,front-right,lfe
In order to get PulseAudio to use the settings contained in these lines, I needed to remove the semi-colon before each of them. The line enable-lfe-remixing = yes tells PulseAudio that there is a speaker on the lfe channel and that it needs to be added to the audio mix. The line default-sample-channels = 2 is what sets the number of audio channels PulseAudio has to stream audio to. I needed to change this number to the total number of speakers that are attached to the system. Since a 2.1 setup uses three speakers, I changed the value from 2 to 3. If I had a 5.1 or a 7.1 setup, I would change the numbers to 6 and 8 respectively. The final line I edited, default-channel-map = front-left,front-right,lfe tells not only PulseAudio but Alsa as well how to handle the mix between the speakers that are attached to the system. The sharp-eyed among you may have noticed that I labeled my subwoofer as an lfe channel. I found that the sound from my system's subwoofer sounded better if I had it labeled as lfe instead of subwoofer. By labeling it as an lfe channel, PulseAudio will send a wider frequency range to it than if it were labeled as subwoofer. This wider frequency range really fills out the sound produced by my laptop.
Once I finished editing and saved the file, I rebooted my laptop. I was pleasantly pleased to hear that I was now getting equal levels of sound out of all three speakers. Now it was time to adjust their individual levels. To do this, I opened the terminal and typed:
Conclusion
Despite the issues I had with my hardware, I find that Deepin is a great DE for daily use. The developers combined the extensions I like using in Gnome 3 with the stock Gnome 3 interface into a very responsive and elegant looking DE. You can see the attention to detail from the developers in how smooth the window animations are and how every user interface in the DE and stock programs feel like they belong together. Taken on its own, Deepin is very user friendly. It is my opinion that it will work out of the box for 90% of users. Combine it with the stability of Manjaro and their "rolling release" philosophy, in my opinion, you end up with a distro that gives the "big boys" a run for their money. Not only has it replaced my Manjaro Gnome install as my daily driver, it has given me a reason to reevaluate my opinion on other "lightweight" DE's. I look forward to seeing where it goes in the future.
I hope you enjoyed my look at the Manjaro Deepin Community Edition as much I enjoyed sharing my experience with you. I am currently working on a Raspberry Pi project and I hope to do an initial post on it before Christmas and New Years. Thank you for reading and see you next time.
Cheers!

Overview
Before I get too far into this post, an explanation needs to be given. There are two projects that use the Deepin name, and to make it even more confusing, they are developed and maintained by the same company, Wuhan Deepin Technology. They are responsible for not only the Deepin Desktop Environment, but also their own Linux distro based on Debian called Deepin Desktop, link. Today I will be discussing the Deepin Desktop Environment and will be calling it Deepin for simplicity.

As with other desktop environments, Deepin comes with its own suite of tools that allows you to adjust your systems settings.

One of the things I really like about Deepin is how it lists the programs installed on the system. It organizes installed programs in a similar manner as Gnome 3 with the Dash to Dock extension installed.

Other than its Control Center and how it lists its installed programs, Manjaro Deepin Community Edition is just like the other Manjaro releases. It uses the "rolling release" model so your installation never goes out of date.

Issues
I was able to boot to the Live Session from a USB drive without any problems. Deepin installed onto my laptop without any issues. Overall the install was very stable. On initial boot, I was greeted with a fully functioning desktop with all the needed drivers installed. Not only, as I stated before, were the correct drivers for my graphics card and network card installed, but my laptop's Bluetooth module was working properly. This module has never worked as it should, even when the laptop was running Windows 7! The install picked up and configured my wifi connection without too much fuss. All I needed to do to really start using my laptop was download and install updates. Needless to say, I was impressed. Unfortunately, I began to notice a couple of issues as I was customizing my install. The touchpad started to act "a bit wonky" and the sound quality I was getting from the built-in speakers was terrible and seemed to be mono only. The touchpad was the easiest to fix, so I will discuss it first.
Note: I tend to restart my system to apply changes instead of stopping and restarting the service. Not only is this a holdover from my DOS and CP/M days when the only way to test a settings change was to reboot, I have found from experience that it is the most accurate way to test if a fix works.
1. Touchpad
My laptop, an Asus ROG G75VW link, uses a Synaptics touchpad. In 2013 when this laptop was built, support for multi-finger scrolling in Windows was in its infancy and not implemented very well. Because of this poor implementation, multi-finger scrolling causes errors when you try to use the edge scrolling function.

2. Sound
Now that I had the touchpad operating the way I like it, it was time to tackle the problem with the sound. My laptop is one of those that has a 2.1 speaker system built in. This means that it has a left and right stereo speakers as well as what can "generously" called a subwoofer.

After trolling the web a couple of days, I stumbled across a solution in the Overclock.net forums. They had this wonderful how-to with explanations of the settings for multi-speaker set-ups in PulseAudio, link. Even though this was posted in 2013, it gave me a starting point to get the audio working properly on my laptop. It stated that I needed to change some settings in the deamon.conf file that PusleAudio gets its settings from. Before doing anything, I wanted to make a back-up. This way if I broke something, I could easily go back to "stock". So I opened the terminal and typed:
sudo cp /etc/pulse/daemon.conf /etc/pulse/daemon.conf.oldNow that I had a backup of my daemon.conf file, it was time to edit it. Since this is a system file, I need to be root to edit it. So I opened it in a root session of Nano by typing:
sudo nano /etc/pulse/daemon.confWith the file opened in Nano, I looked for the following lines and edited them as follows:
; enable-lfe-remixing = yes to enable-lfe-remixing = yes
; default-sample-channels = 2 to default-sample-channels = 3
; default-channel-map = front-left,front-right to default-channel-map = front-left,front-right,lfe
In order to get PulseAudio to use the settings contained in these lines, I needed to remove the semi-colon before each of them. The line enable-lfe-remixing = yes tells PulseAudio that there is a speaker on the lfe channel and that it needs to be added to the audio mix. The line default-sample-channels = 2 is what sets the number of audio channels PulseAudio has to stream audio to. I needed to change this number to the total number of speakers that are attached to the system. Since a 2.1 setup uses three speakers, I changed the value from 2 to 3. If I had a 5.1 or a 7.1 setup, I would change the numbers to 6 and 8 respectively. The final line I edited, default-channel-map = front-left,front-right,lfe tells not only PulseAudio but Alsa as well how to handle the mix between the speakers that are attached to the system. The sharp-eyed among you may have noticed that I labeled my subwoofer as an lfe channel. I found that the sound from my system's subwoofer sounded better if I had it labeled as lfe instead of subwoofer. By labeling it as an lfe channel, PulseAudio will send a wider frequency range to it than if it were labeled as subwoofer. This wider frequency range really fills out the sound produced by my laptop.
Once I finished editing and saved the file, I rebooted my laptop. I was pleasantly pleased to hear that I was now getting equal levels of sound out of all three speakers.

sudo alsamixer. This command opens AlsaMixer, (see left), which is used to edit the sound levels of any audio device attached to the system including any speakers. Now that I had AlsaMixer open, I started to play some music through the speakers using Deepin Music. This allowed me to adjust the mix between the speakers in real-time until I achieve the sound I like. In my case, I was using the song "Quietus" from the Dutch symphonic rock band Epica. Back in AlsaMixer, I used the left and right arrow keys to select the "Bass Spe". Then I used the up and down arrow keys to adjust the subwoofer's volume level. Once I had the volume level where I liked the overall sound, I exited out of AlsaMixer by hitting the escape key. After exiting the terminal, I rebooted the system to see if the settings stuck. By completing the above steps, and a little more experimenting with some levels in AlsaMixer, the speakers in my laptop sound really good. I can actually listen to music on it and hear the stereo separation between the channels.Conclusion
Despite the issues I had with my hardware, I find that Deepin is a great DE for daily use.

I hope you enjoyed my look at the Manjaro Deepin Community Edition as much I enjoyed sharing my experience with you. I am currently working on a Raspberry Pi project and I hope to do an initial post on it before Christmas and New Years. Thank you for reading and see you next time.
Cheers!


I do not use the hibernate function on my laptop. So I have not even looked into it. After a quick search on the Manjaro forums, I found that the lack of hibernation may be cause by a bug in the Calmares installer. The steps to correct it can be found here: https://forum.manjaro.org/t/no-hibernation/29916/23
ReplyDeleteVery nicely written and thorough review! I too find DDE to be quite elegant and "user friendly" (whatever that means). Haven't tried Manjaro's version, despite years of enjoying their KDE and Xfce flagships, but I have found that DDE seems to work better on Arch than the official (based on Debian) version. Probably due to the fact that Debian other than stable has issues with my graphics card (Nvidia GE 240, requiring the 340 series driver). Nouveau is really flaky with this card.
ReplyDeleteBased in part on this review, I guess I'll have to take the next step and grab the Manjaro Deepin spin, making for three separate Manjaro installs on this aging desktop. I'll probably never grow to love any desktop environment more than KDE, but DDE is giving Xfce competition for second place. Thanks for writing!
I am glad I could help to give you something to think about. I never thought I would move away from either Mate or Cinnamon, but Deepin won me over. I go back to my wife's machine that runs Mate, and I found that I really do not like it.
Delete